
Walkthroughs
Walkthroughs around the IT Asset platform from a demo site : snipe IT.
Admin
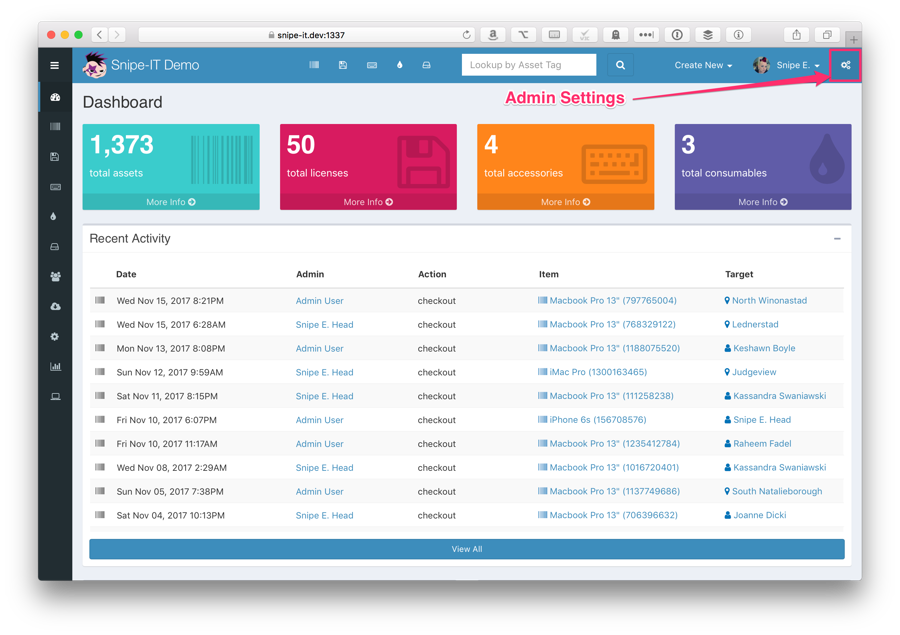
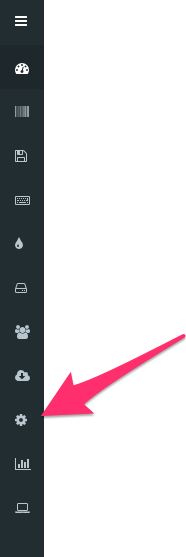
To access the admin settings, click on the gears icon in the top right navigation bar.
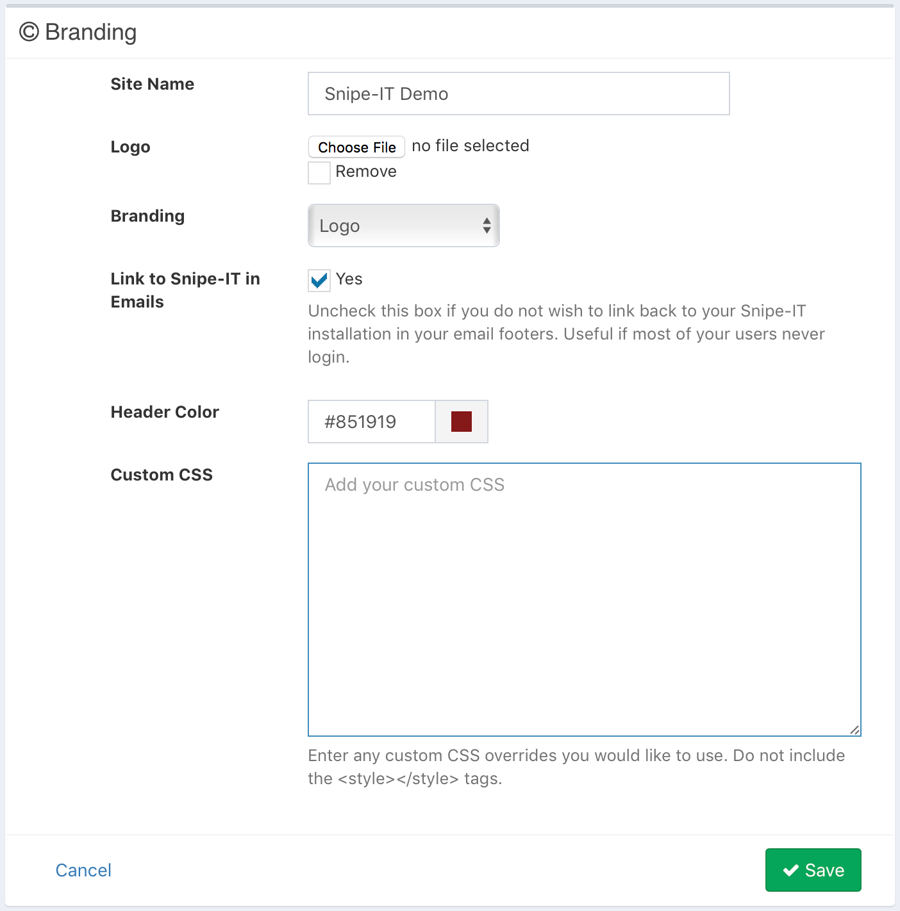
You'll also see a color picker tool that will allow you to select a header color from a palette, but if you know the hex code for the color you want, you may enter that directly as well.
General Settings
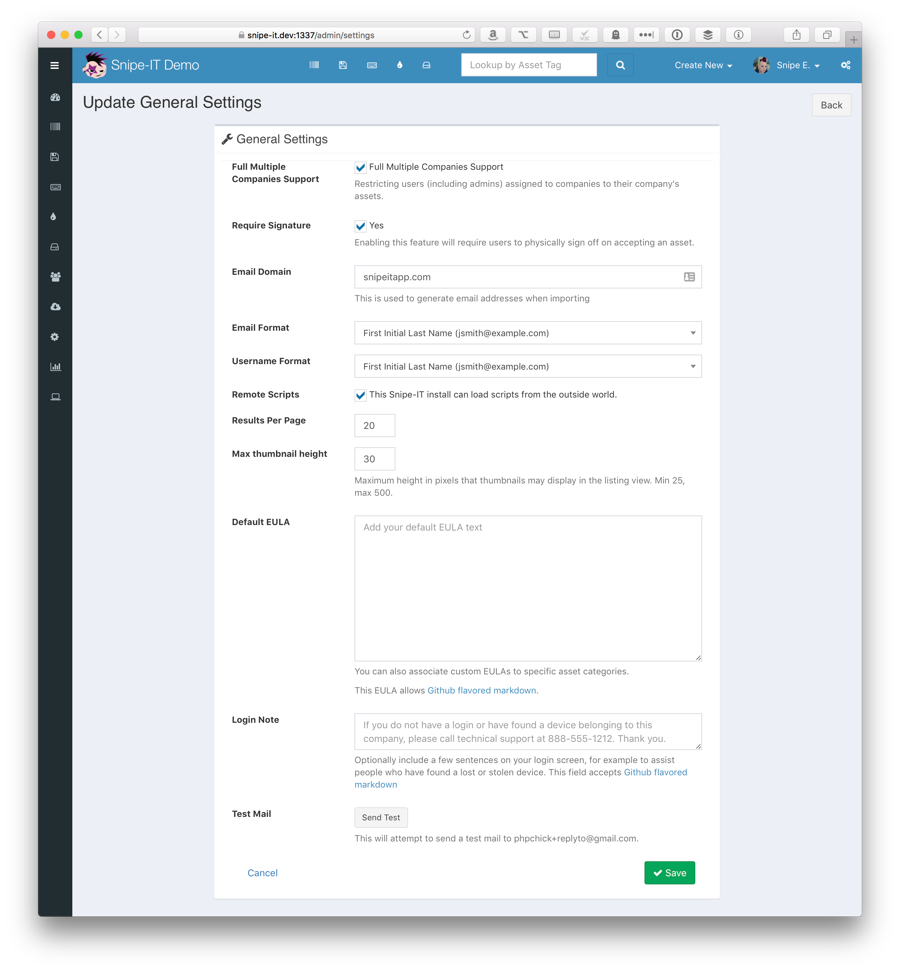
The General Settings panel allows you to configure aspects of your install such as Full Company Support, whether or not to require physical (digital) signatures on assets, and so on.
Important: Remember that you must enable the acceptance requirement at the category level for your users to actually receive the email requiring them to accept an asset. This provides more granular acceptance options for a wider range of asset type.
Email Domain
The email domain should be set to whatever your company's primary email domain is: [email protected] Status Labels
Status labels are used to describe the state of the asset. You can add as many status labels as you’d like. Each status label will have one of four characteristics that describe the state of assets with that status label:
Status Label
Undeployable
These assets cannot be assigned to anyone.
Deployable
These assets can be assigned to people
Archived
These assets cannot be assigned to people, and will only show up in the Archived view
Pending
These assets can not yet be assigned to anyone.
Use status labels however you see fit. You can just keep the starter labels we set up for you, or you can flesh out a detailed set of statuses that will make sure your team always knows exactly what’s going on with each asset.
If you set up your status labels well, they can be enormously useful. A status label that is a pending label named “Awaiting Re-Imaging” tells your team that this item can’t be deployed because it’s still in the re-imaging stage and isn’t ready yet. Once it’s ready, your team can update the status to “Ready to Deploy”, and then it’s added to the pool of available deployable resources.
*Once an asset that belongs to a status that is "Deployable" is assigned to a user, it assumes the meta status of "Deployed".
Column Selection
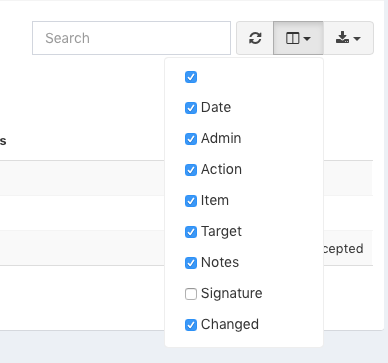
In most of the table-based interfaces in Snipe-IT, you have the option of showing or hiding specific columns, so that columns you don't care as much about don't take up space on your screen, and columns you do care about are easily visible.
To use this feature, simply click on the icon that looks like a split-pane window in the top-right of the table interface. Checking and unchecking the checkmarks next to the column name will show and hide the columns accordingly.
Test Mail
This button allows you to test the mail functionality of Snipe-IT. It will send a test email to whatever the MAIL_REPLYTO_ADDR is set to in your .env. In this case: [email protected]
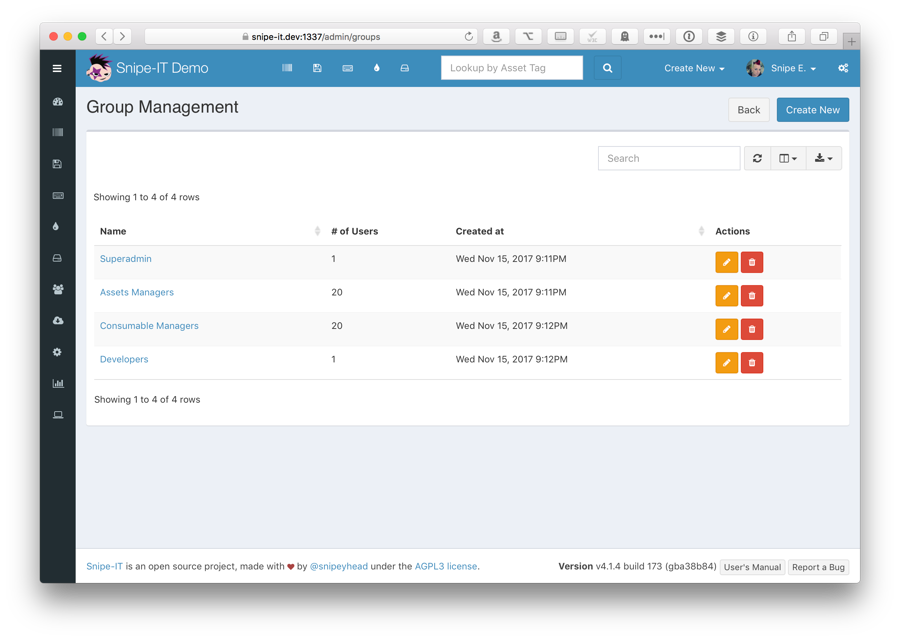
Groups
Groups are a way to easily manage permissions for a large numbers of users. The easiest way to manage user permissions in a larger organization is through groups (versus having to manually apply granular permissions to each user.)
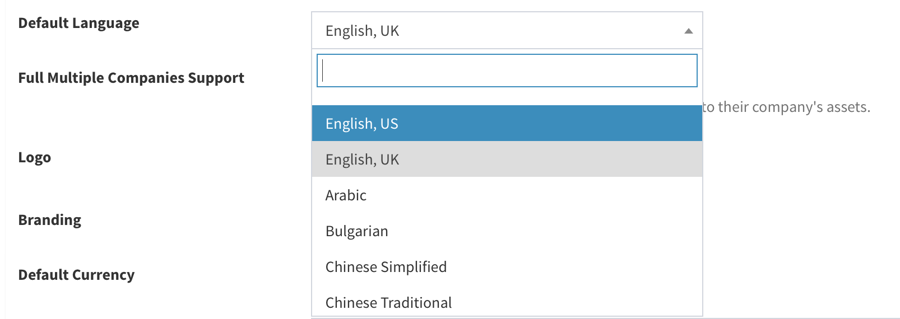
Language
You can change the default language used by Snipe-IT by selecting a different available locale from the Admin > Localization Settings menu.
Asset Models
Every asset needs an asset model, so setting these up next will help you start adding assets. Asset models can be things like the make and model of a laptop or desktop machine (Apple 13″ Retina, for example). When you create new assets, you’ll select whichever asset model makes sense.
Every asset needs an asset model, so setting these up next will help you start adding assets. Asset models can be things like the make and model of a laptop or desktop machine (Apple 13″ Retina, for example). When you create new assets, you’ll select whichever asset model makes sense.
Notifications
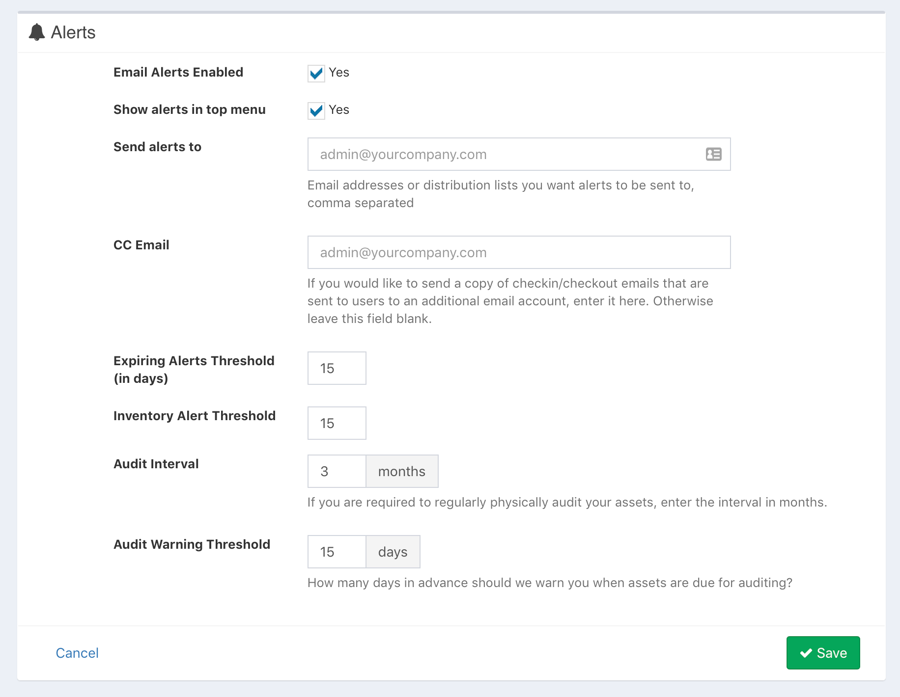
Email Alerts Enabled
If selected, this will will send email alerts to the Send Alerts To address (below), if there are any alerts triggered. Alerts include low inventory, license expiration, and warranty expiration notifications.
Show Alerts in Top Menu
You can enable or disable inventory alerts in the top navigation bar by enabling or disabling this option.

Send Alerts To
This should be an email address or comma-separated array of email addresses that alerts should be sent to.
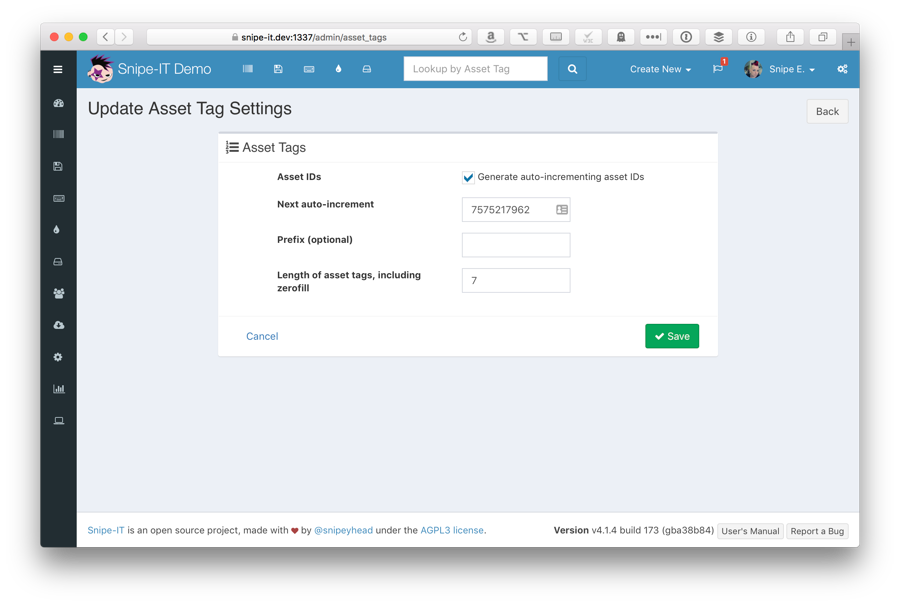
Asset Tags
Asset tags are the unique identifier of an asset within the Snipe-IT system. No two assets can have the same asset tag - which makes sense, since that could get really confusing.
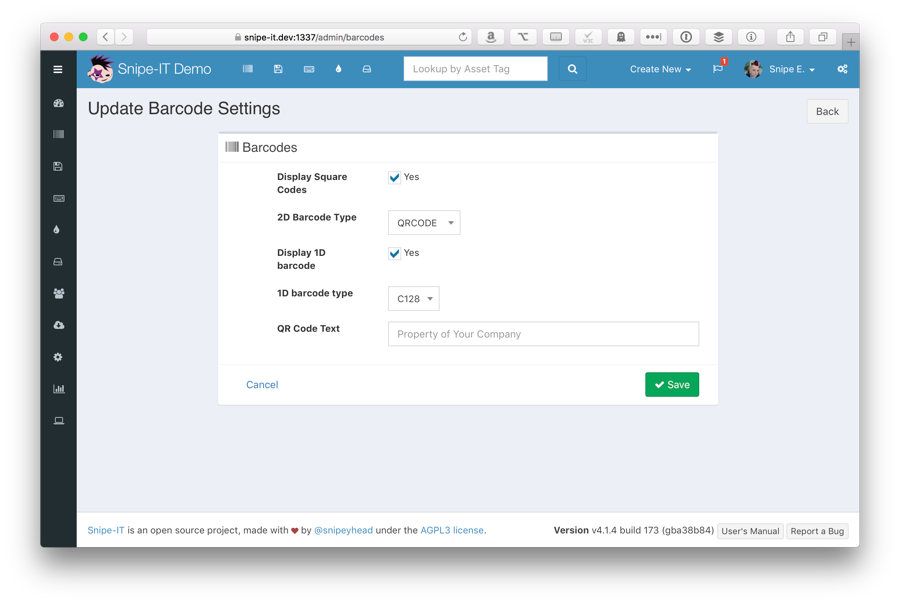
Barcodes
Snipe-IT supports both QR codes and 1D barcode formats. In later versions of Snipe-IT (v6.3.0-pre and later), we have introduced a new label engine that should work better with a wider variety of configurations. You can switch back and forth between them to see what works best for you.
Legacy:
Example of IT Alfa Valves Barcode

Asset Labels
Generating labels for your assets is very simple in Snipe-IT. Simply go to any of the asset listing views (Ready to Deploy, Deployed, etc) and use the checkboxes in the leftmost column to select the assets you'd like to generate labels for. Once you've finished your selection, scroll down to the bottom of the asset listing table, and select "Generate Labels" from the dropdown list.

Backup & Restore
Snipe-IT comes with GUI-based and command line based backup and restore utilities. You can generate or download a backup in Admin > Backups through the web interface:
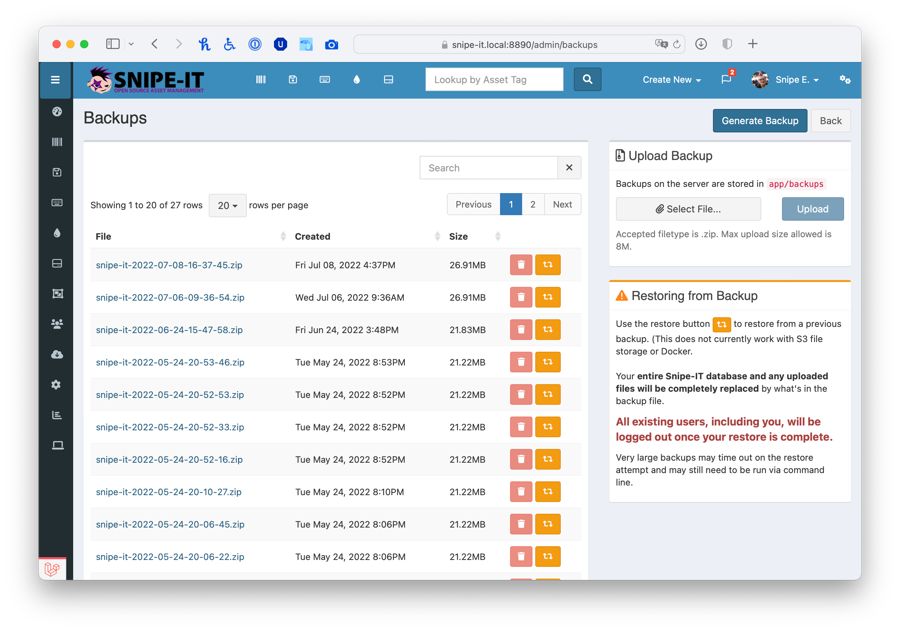
Example of backup page

Asset Models
Every asset needs an asset model, so setting these up next will help you start adding assets. Asset models can be things like the make and model of a laptop or desktop machine (Apple 13″ Retina, for example). When you create new assets, you’ll select whichever asset model makes sense.
Categories
Categories are used by both assets and accessories. Categories describe the general type of asset or accessory, such as “wireless keyboards”, “laptops”, and so on.
Categories are important because they contain attributes that are inherited by both the assets and accessories that belong to them, such as whether to email the end-user when an item has been checked out to them, whether to require the user to click on a link to show that they have received the asset or accessory, and whether or not the user should be emailed a EULA.
Every asset and accessory needs to belong to a category, so you’ll need to set these up before adding assets.
To start creating new ones click on the gear icon on the left side of the screen:
Importing Assets and More
There is a Web GUI importer available in the Import section that will allow you to upload and process and import a comma-delimited CSV through the web interface. The importer may choke on larger imports, so if you have more than several hundred records to import, you may wish to use the command-line tool.
IMPORTANT
BACK UP YOUR DATABASE FIRST. Always run a backup (Admin > Backups) before running the importer, so that you have a clean place to roll back to if something goes wrong.
Managing Users
To manage users within your Snipe-IT system, simply click on the "People" link. We recommend using permission groups (in Admin > Groups) to handle your user permissions, so that any additional granular permissions that get added down the line can be easily applied to all of the appropriate users without having to edit them one by one.
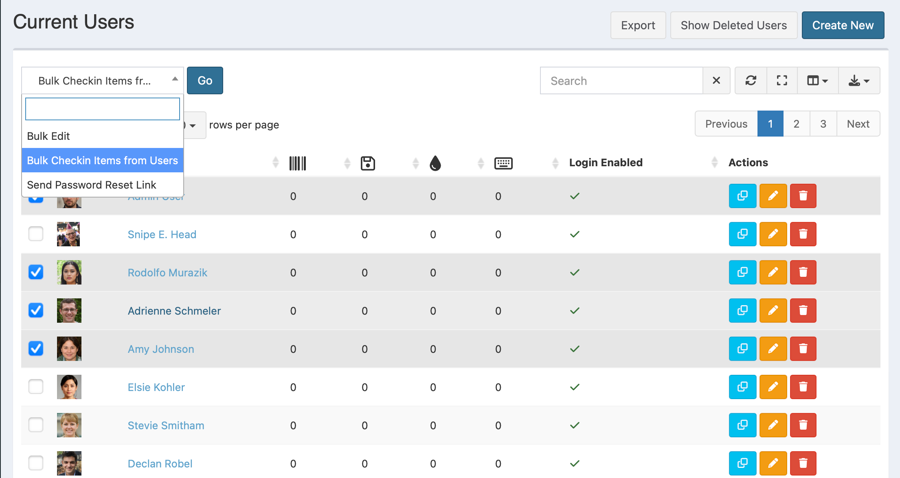
Bulk Checkin / Deleting Users
Snipe-IT allows you to bulk checkin items from all selected users with the option to delete the users at the same time using the Bulk Checkin option from the dropdown on the People page.
Select the users you want to bulk checkin from and click the "Go" button.
Permissions
Snipe-IT provides two privileged user account tiers, Admin and Superadmin, and a wide variety of more granular permissions for non-admin/non-superadmin users.
Superadmin
Can edit ALL admin settings, create new Groups, Locations, Status Labels, etc, and is NOT constrained by Company scoping when Full Company Support is enabled.
Admin
Can NOT access Admin Settings, and IS constrained by Company scoping when Full Company Support is enabled, but can perform all functions (create, edit, delete, etc) for all other aspects of the app.
Other
Can NOT access Admin Settings. All other privileges are granted on a group-level or individual level.
Managing Assets
Assets in Snipe-IT are anything that have an asset tag. Asset tags are always unique, and are meant to be used with barcode labels affixed to the assets themselves - although it's perfectly fine to use Snipe-IT without ever using asset labels. Use Snipe-IT however works best for you.
While assets have a set of required and optional fields, you can also create your own Custom Fields for your assets to track additional information that Snipe-IT itself doesn't account for.
Best Practices
📘Checking out assets to non-people
While it is possible within Snipe-IT to check assets out to targets other than users, for example checking an asset out to a location, or another asset, we discourage this practice.

Matching assets for history import happens against the asset tag.
The Snipe-IT History Importer will try to find a matching user based on the user's name you provide, and the criteria you select from the history import form. If you do not select any criteria in the form, it will simply try to match on the username format you configured in the Admin < Settings.
Fields included in the CSV must match the headers: Date, Asset Tag, Name:
Date
2015-10-08
2015/10/08
10/08/2016
10/8/2016
10/08/2016
Checkout date. Can take any date format that can be translated by strtotime(), but YYYY-mm-dd will always be easiest. Do not use dd-mm-YYYY, as it will not parse correctly.
Asset Tag
SN23455
This is the asset tag of the existing asset you'd like to import that checkout for.
Name
Jane Smith
The name (firstname lastname) of the user the asset was checked out to.
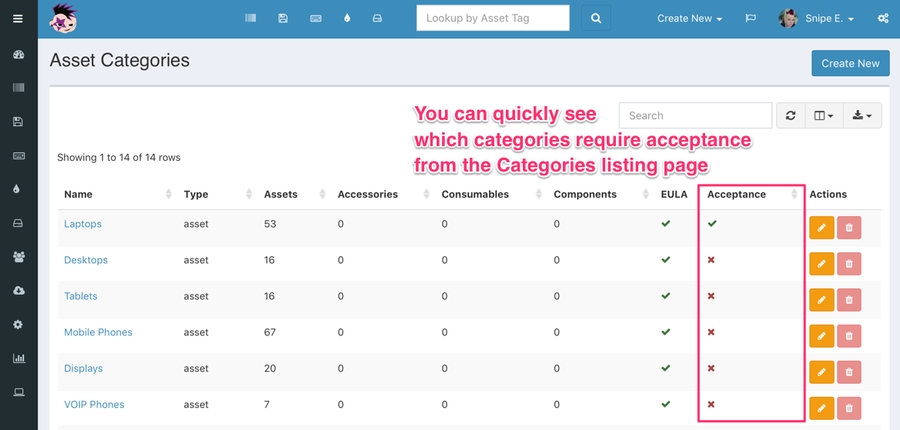
Asset Acceptance
If the asset model that an asset belongs to is part of a category that requires asset acceptance, an email will be dispatched to the user, prompting them to login and click on a link to confirm that they have received the device.
Physical Signatures
Starting from version 3.6.0, you can require a physical signature on asset with the asset acceptance/declination. With this enabled, users will be prompted with an on-screen signature box where they can sign their name with their mouse, or their finger on any touch-enabled device.
Important
Remember that you must enable the acceptance requirement at the category level for your users to actually receive the email requiring them to accept an asset. This provides more granular acceptance options for a wider range of asset type.

Cloning Assets
The "Clone" button on the assets listing page allows you to quickly create a new asset with the same overall characteristics as the asset you're cloning. This means the new cloned asset will have the same Asset Model, model number, custom fields, supplier, purchase date, purchase cost, order number, notes, warranty months, etc.

🚧
A note on cloned asset images
Images uploaded to a specific asset will NOT be copied over to a newly cloned asset. The reason for this is that generic asset images should be set at the asset model level. Images uploaded to specific assets should reflect only that asset.
For example, if you have an asset called "Birgit's Laptop" - a 13" MacBook Pro Retina, with asset tag 12345678 - the asset image you upload to that specific asset should only be related to that particular asset.
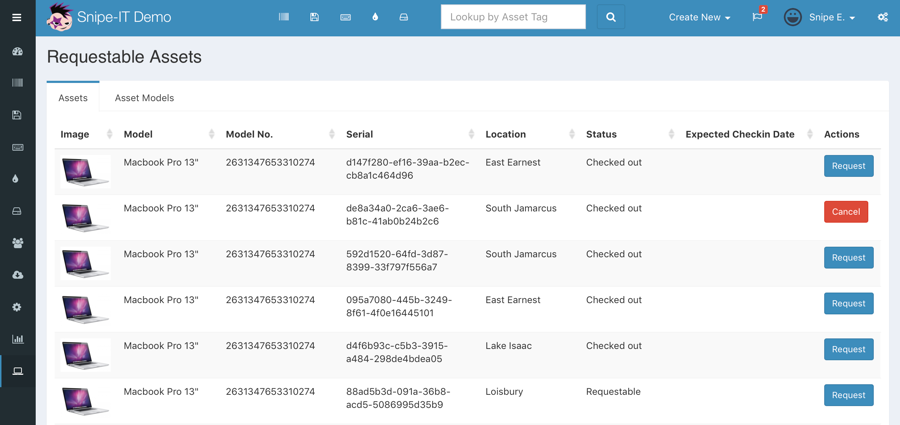
Requestable Assets
Snipe-IT comes with the ability to permit users to easily request assets.
Individual assets can be marked as requestable, and asset models can also be marked as requestable, which allows users within Snipe-IT to request a specific asset, or any asset that matches the asset model they require.
Managing Licenses
Snipe-IT's concept of licenses works a bit like our Asset Models work for assets. The license itself is a sort of container of common properties - you actually assign the seats of the license.
Last updated